


- 翻译公司资讯
-
世联翻译公司完成软件和应用软件专业领域英文翻译
发布时间:2018-01-18 09:25 点击:
世联翻译公司完成软件和应用软件专业领域英文翻译
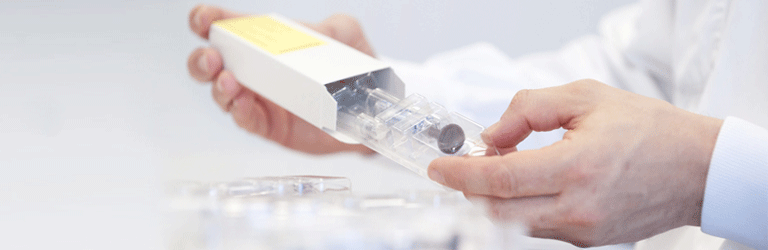
ContentsVSC Suite Operation Modes 1Normal 1Standalone 1Log-in / Create new users 1Selecting existing users 2Creating a new user 2VSC Main Screen 2Workspaces 3Advanced 3ID Documents 3Banknotes 3Quick Check 3Display Modes 4Normal 4Live + Stored 4Full Resolution 4Shortcut Menu 4Basic Controls 5Camera controls/Camera Ribbon 5Automatic Mode 5Manual Mode 5Iris 5Integration 6AOI – Area of Interest Auto Exposure 6Focusing 6Manual focusing 6Focus Assist 7Auto focusing 7Other Camera Ribbon Controls 7Source 7Sharpness 7Brightness 7Auto Contrast; Histogram 7Gamma 8White Balance 8Magnification; Zoom controls 8Optical magnification 9Digital magnification 10Motorised X-Y Translation Stage 11Light sources 12Flood Lights 12Examples of absorption and reflectance examinations 13Spot lights 14White Spot 14Spot (IR Fluorescence) 14Examples of fluorescence using the spot light 14Fluorescence Scan 15Bandpass filter for Infrared Absorption 16Exaggerated Spectral Change 17Circularly Polarised Light 18Ultraviolet lighting 18Examining Phosphorescent items 19Transmitted ultraviolet (365 nm) 20Transmitted Flood 20Transmitted Spot 20Side Lighting 20Composite Image 21Coaxial lighting 22OVD Viewer 23Anti-Stokes flash 26Combination Lighting 27Image types / Frame controls 27Frame controls 27Additional Frame Controls 28Notepad 28Video Control 29Capturing images 29Saving Images (Save as...) 30Recent Images gallery 31Position on Screen 32Image Options 32Show image settings 32Apply Image settings 32Save as ... 32Delete 32Rename 32Print Image 33Image Modes Panel 33Position 1 33Image Capture 33Position 2 33Image source 33Split Images 34Split (Horizontal) 34Split (Vertical) 34Strobe 34Mixed Images 35Mix (1+2) 35Difference 35Red/Green Mix (1+2) 35Repositioning Image 2 (Stored Image) 36Capturing Mixed Images 36Tools Ribbon 37Reset 37Make Annotation Permanent 37Image Processing 37Document Database & Currency Database 38Keesing Database 39User Database 39READ Mode 39Database path 42Database used 42WRITE Mode 42Adding images to an existing user entry 44Invisible Personal Information (IPI) 46Tips for revealing IPI features 47Add Preset 48Delete 48Update 48Enhance 48Optical Character Recognition (OCR) 49e-Passport Reader 50LetterScreen++® 51Latent Image Viewer 52Barcode Reader 52Auto Examine 54Auto Examine Matrix Controls 56Hyper Spectral Imaging (HSI) 56Saving HSI data 58Loading HSI data 58Using the Spectrometer in HSI 58False Colour 59Mark Similarly Spectral Areas 60Ruler 60Fluorescence Scan 60Measure Shading 60Isolate Colour 61Remote Viewing 61Banknote Area 61Adding notes to Banknote Area list 61Comparing banknotes 62Image Ribbon 62Copy into store 62Recent Images 62Best Image 62MegaPixel Capture 62ID3 60 Mpixel imaging (compressed) 63ID3 Image stitching 63A4 Image stitching 64Sub pixel stepping (19 Mpixel) 64Three colour imaging 65RAW Pixel stepping 65Focal plane merging 65Copy image to clipboard 65More 65De-speckle 65Flatten 66Align 66Rotate 66Crop 66Create Mosaic from Video 66Camera channel selector 66Colour 66Pseudo-colour 67Monochrome 67Red/Green/Blue Component 67Brightest 67Overlays 67Ruler 67Graticule 67Typewriter Grid 68Cross hairs 68Spectrometer crosshairs 69Display Modes 69Digital magnification 69Annotations and Measurements Ribbon 69Select tool 69Draw Line 69Draw Multi-Point Line/Freehand 70Draw Arrow 70Add Text 70Draw Rectangle 70Draw Ellipse 70Selects Feature onto White Background 70Temporarily Measure Distance 70Measure Distance 70Measure Area 70Measure Angle 70Measure Radius 70Customised Grid 71Pixel Value 71Line Graph 71Ruler (Calibration) 71Make Annotation permanent 71Colour selection 71Font selection 71Open template 71Save template 71Spectrometer Ribbon 72Spectrum processing 76Difference 76Rate of Change 76Normalise 76Undo Normalise 76Average 76Chromaticity co-ordinates 77Additional options 78CIE Table Columns 78CIE diagram type 78Viewing Angle 78Illuminant 78Zoom Controls 78Chromaticity diagram 78Other Spectrometer Controls 79Measure white reference 79Record Spectrum/Pause recording 79Integration 79Reflectance/Absorption 79Scaling 79Make crosshairs part of image 80Copy into Store 80Stop 80File Ribbon 80Exit 80Image 80Settings 81QuickCheck Settings 81Scanner 81Options 82General 82Options 83External Camera 84Auto Exposure 84Customise 85Diagnostics 86See Manual 86About 86Tutorial 86F+F Website 87View Ribbon 87Working Folder 87Folder Details 88Folder Images 88Print Options 89Spectrum Screen 90Standby 90Macros Ribbon 91Image 93Edit 93Image Processing (Add Macro) 94Administrator Setup Ribbon 94Lamp Maintenance 94Replacing lamps 95Lamp Test 95Monitor Setup 95Security 96Diagnostics 97Spectrometer Calibration 97Set Detector Position 98Wavelength 98Calibration 99Bandpass filter 99ID1; ID2; ID3 99Magnification; Supplementary Lens 99Focus 100Other functions 100White Balance (IR) 100Restore Calibration 100Save Calibration 100Update Firmware 100VSC Suite Operation ModesThe VSC Suite can operate in two modes: Normal and Standalone.NormalUsing the software with the VSC unit.Switch on the VSC main unit (power button at the front left side of the unit). The “foster + freeman” panel on the front of the unit will be illuminated in red, to indicate that the main unit has power, but is not operating.Double-click on the VSC Suite software icon on the computer desktop to open the software. Proceed to the log-in stage.StandaloneUsing the software on its own (VSC main unit switched off; no illumination of the “foster + freeman” panel). Allows the user to access stored/saved images and data without having to switch on the VSC.To use the software in standalone mode, open the software as before, however this time the VSC unit is switched off. As the software is initialising, you will encounter the following message:Click ‘Ignore’ to proceed to the log-in stage.PLEASE NOTE: This window will also appear if the software is already open or the USB lead is not connected.Log-in / Create new usersAfter starting the VSC Suite software (in either modes), you will be presented with the ‘Log-in’ screen. Here you can select different user profiles to use the software, or you can create new users.Selecting existing usersTo select your user profile (if created), click on the drop down arrow to show a list of all profiles created, then select the appropriate profile.Select the desired working folder, either the ‘Default’ folder, or ‘Use Last Folder’, to proceed to the VSC main screen.Creating a new userTo create a new user, highlight the user text as shown below:Now type the name of the desired new user. After selecting the desired working folder, a message will appear asking to create the new user. Click ‘Yes’ to proceed to the VSC main screen as the new user.VSC Main ScreenAfter logging in, the main screen will be displayed:Main screen1Main Image 6 Image Modes Panel2 Notepad 7 Magnification / Zoom controls / Workspace3 Spectrometer Preview 8 Settings at a glance / Tool tips4 Illumination Panel 9 Menu Ribbons5 Filters Panel 10 Recent Image Gallery PanelWorkspacesThe main screen can be customised to suit requirements. Functions can be streamlined so that menus and ribbons show only those buttons you need: superfluous buttons are hidden. This is achieved by selecting the appropriate workspace:The workspace selection dropdown menu is found in the top right corner of the screen. The default setting is Basic. In this setting, the number of onscreen options in each menu ribbon is reduced. Features such as the Spectrometer, for example, are not visible. Higher functions, such as Administrator Settings, are not available. There are number of additional workspace pre-sets:AdvancedAll features and functions are available.ID DocumentsDisplays only Tools relevant to identity documents, e.g. Passports; ID cards. The Image Ribbon is also reduced. The Camera Ribbon has all features available. Administrator Settings Ribbons is not available.BanknotesThe majority of functions are the same as ID Documents, but the Tools are relevant to examining banknotes. OCR reader, the Barcode reader and IPI are not visible.Quick CheckThis is the most stripped down version of the software available. It is designed specifically for looking at bank cheques, and is tailored to this purpose. In addition to having more reduced ribbons than Basic, the Illuminations, Filters, Image Modes and Recent Images tabs are not available. Instead, the Quick Check Panel allows for the selection of a limited number of light sources, as well as different colour components of the camera. These functions can also be automated to run in sequence. The tabs at the bottom of the Quick Check Panel give the facility to complete brief details for generating a report.For the purposes of this manual, the Advanced workspace will be used throughout.It is also possible for users to create personalised workspaces. See File Ribbon: Options (p. 82).Display ModesThe software can operate in three alternative display modes. See also: Image Ribbon (p. 62):Normal Live + Stored Full ResolutionNormal1224 x 978 pixels: Default display mode. This mode has faster image refresh rates than full resolution and therefore requires less processing capacity.Live + StoredDisplays two images side-by-side, allowing images to be compared.Full Resolution2448 x 1956 pixels: Provides the largest available magnification but cannot be used for certain software features.Reduces the image size to provide a ratio of 1:1Reduces the image size to provide a ratio of 0.5:1Shortcut MenuA shortcut menu is displayed by right-clicking the mouse whenever the cursor is located within the main image. The menu lists commonly used commands from the menu ribbons and can be customised for each user profile. See: File Ribbon: Options (p. 80)Basic ControlsCamera controls/Camera RibbonAdjusts the exposure of the live image, ensuring that the correct amount of light is entering the camera.Under-exposed Correctly exposed Over-exposedThe camera can operate in two exposure modes: Automatic or Manual.Automatic ModeThe VSC will determine the optimum settings depending on the light source and document under examination.The camera controls are in automatic mode when ‘Auto’ is coloured red:Manual ModeAllows manual adjustment of the camera to optimise the image: Iris; Integration.Automatic mode will be suppressed when the user manually adjusts the iris or integration. In manual mode, the word ‘Auto’ will no longer be coloured red.To return to automatic mode, click on the word ‘Auto’. Any manual settings will be overridden.IrisControls the amount of light entering the camera, it is measured as a percentage. Greater percentage = Brighter image; Smaller percentage = Darker image.The iris will also affect the depth of field and image sharpness, particularly at the edges of the image. In general, a smaller iris (lower %) will produce a greater depth of field and sharper images.Click on the left or right arrows to adjust in small steps, or select an option from the drop down list.IntegrationControls the length of time over which light is captured by the camera.Longer integration time = Brighter image;Shorter integration time = Darker image.Click on the left or right arrows to make smaller adjustments or move the slider bar to make larger adjustments.AOI – Area of Interest Auto ExposureThe Automatic Mode will adjust the camera settings to compensate for the brightest area in the image. However, sometimes this may be a simple reflection on a particularly shiny surface, which may result in under exposure for the image as a whole.The AOI function will produce a small orange box on top of the image, and the camera settings will be automatically adjusted to give ideal exposure for the area in this box.The box can be dragged to the desired area of the image using the mouse.This feature can be turned off by clicking the AOI icon a second time.FocusingManual focusingDefault option: Scroll back and forth with the scroll wheel on the mouse to adjust the focus.When focusing, a focus indicator will appear. The vertical red bar indicates the calibrated focus position for a flat piece of paper.Focus AssistWhen manually focusing, a small, digitally magnified square will be displayed in the image. This square is an aid to focusing and can be dragged to the desired area of the image. The mouse cursor must remain inside the square. After a short period of inactivity, the focusing aid will disappear. The feature can be disabled if required. See File Ribbon (p. 80) or the controls in the top left of the image frame.Auto focusingAutomatically adjusts the focus. The process may take a few seconds.NOTE: The auto focus feature will not continuously focus the live image. If magnification, illumination etc. are adjusted or if the sample is repositioned you may need to re-focus the image.Other Camera Ribbon ControlsSourceSpecifies the required imaging device, according to those available: VSC camera; Magnetic ink reader; External camera/microscope.SharpnessAdjust the slider to the left to soften edges in the image. Adjust the slider to the right to sharpen edges in the image.BrightnessAdjusts the image brightness on the screen. Default value = 50. Adjust the slider to the left to darken the image. Adjust the slider to the right to brighten the image. Click the black arrow to reset to the default value.Auto Contrast; HistogramThe software will automatically adjust the contrast of the onscreen image. The greyscale graph next to the Auto Contrast button represents the tonal range of the image.To adjust the contrast manually, click Auto Contrast.The blue bar represents the unadjusted areas of the tonal range. Any areas to the left of the blue will be defined on screen as black pixels, while any areas to the right will be defined as white pixels. The sliders at either end of the histogram can be used to adjust where the cut-off point of the blue bar is at either end, creating a higher contrast image.GammaApplies gamma correction to the image, brightening darker areas. Gamma correction will be automatically applied for light sources that produce fluorescence, e.g. Spot (IR Fluorescence); UV. Click the icon to disable this feature.White BalanceAdjusts the white balance of the camera. Before using this function, it is recommended that a white reference item, such as a plain sheet of paper, is placed on the document platen. The software will automatically adjust the colour balance based on the current image. This process will take a few seconds. The image will change colour a number of times before the process is completed. The dialogue is displayed:Choosing “YES” will use this new white balance setting from now on, for every user profile, for the currently selected light source and camera. “NO” will use this white balance for the current session, but will forget the new settings once the software is closed. “CANCEL” will immediately revert to the previous white balance settings for the current light source.Magnification; Zoom controlsOptical zoom Digital zoomTwo types of magnification are available: optical and digital. The controls for optical magnification can be found in the top right of the software. The controls for digital magnification are found in the Image Ribbon.Optical magnification: Employs a zoom lens to magnify the optical image, producing the best image quality.Digital magnification: Magnifies the displayed image by making the pixels bigger. An interpolation process adds pixels to this image, resulting in a poorer quality image.Optical magnificationThere are three ways to adjust the optical magnification:1) Slider controlMove the slider left to increase, or right to decrease the magnification. The range of magnification for this control is approximately x1.5 – x30 (Normal display mode).2) Adjustment arrowsThe left and right arrows can be used to adjust the magnification in very small increments.3) Drop down listTo increase the magnification to a higher value than x30, click on the drop down arrow to reveal a list of pre-sets:This will allow the highest magnification settings to be applied, in this case x59 (≈60x) and 186x (≈180x), based on the Normal display mode (p. 4). The pre-sets ID1, ID2 and ID3 refer to IACO standard document sizes. CSTM is a user-defined pre-set, entered via the Administrator Setup Ribbon (p. 94).NOTE: When selecting or deselecting the highest magnification setting, please wait while the VSC applies the new settings. It is not possible to switch from Normal to Full Resolution display mode once the maximum magnification has been selected.When the highest magnification is activated, focusing using the mouse wheel can be more difficult. It is advised to use the Fine Focus controls that are available only in this magnification setting.4) Keyboard Hot Key ShortcutHold down the SHIFT key and use the mouse wheel to increase or decrease the magnification. The range of magnification for this control is approximately x1.5 – x30.Digital magnification1. Frame magnificationDigitally magnifies the entire image: x2; x4; x8. Click, as required. The digital magnification can be applied to either live or stored images.Scroll bars allow the user to move around the entire image.Click the icon again to de-activate the feature.An alternative method to access digital magnification is to use the keyboard hot key shortcut. Hold down the CTRL key and use the mouse wheel to increase or decrease the magnification. This will alter the digital magnification by any value between x1 and x8.2. MagnifierDigitally magnifies a small region of the image.Click the icon to activate the magnifier, and drag the magnified square area to reposition. Click the icon again to de-activate the feature.Motorised X-Y Translation StageThe X-Y translation stage allows for the fine movement of the examination plate with all the safety flaps closed. The stage is controlled via the control buttons found to the bottom right corner of main image.The button in the middle of the grid will re-centre the X-Y stage to its default position. The red and green rectangles represent the X-Y stage and the field of view respectively. The green rectangle will move around to show the relative movement of the stage. Selecting the small tick box will invert the direction controls.The stage can also be moved by using a keyboard hot key shortcut:Hold down the ALT key, and then use the cursor keys to move the stage in the desired direction. The HOME key will re-centre the stage.The stage can also be moved by using the mouse to drag a point of the image to the desired location on screen. Alternatively, double clicking on at any point on the image will centre the stage on that point.Light sourcesLight sources are selected and controlled via the illumination panel:1 Flood (IR abs/ref) 9 Transmitted Ultraviolet (365 nm)2 White Spot (IR abs/ref) 10 Transmitted Flood3 Spot (IR Fluorescence) 11 Transmitted Spot4 Polarised lights (Circularly- and Cross-) 12 Anti-Stokes5 Infrared Absorption using Bandpass Filter 13 OVD Viewer6 Ultraviolet (365 nm) 14 Side7 Ultraviolet (312 nm) 15 Coaxial (for retro-reflection)8 Ultraviolet (254 nm) 16 Combination lightingFlood LightsDefault light sources. Used for general examination of a document.The light source emits visible and infrared (IR) light, and therefore can be used for IR absorption examination in conjunction with appropriate camera filters.The FILTERS panel contains the controls for all of the filters within the VSC. When the flood lights are active, the only filters that are available are the longpass camera filters (shown right).To select a filter, click on the name of the desired filter. : To scroll the filters up or down, use the adjustment arrows.The graph shown below the filter controls displays the range of wavelengths which the camera is viewing. The selected filter is also displayed at the top of the filters panel.Allows automatic sequencing of filters. Once activated, the VSC will cycle through all filters that are ticked, starting at the lowest filter. Click the icon again to pause the sequencing, click again to resume.The default time for which each filter is selected during sequencing is 5 seconds. This time can be changed. See File Ribbon, Options p. 82).Examples of absorption and reflectance examinations100 Euro banknoteVisible IR filter: 780 nmAltered information on a chequeVisible IR filter: 695 nmSpot lightsWhite SpotOnly available at optical magnifications of x6x or greater.This light source may be preferred to normal flood lights when examining documents at high magnifications. It can still be used for IR abs/ref examinations.Spot (IR Fluorescence)A high-intensity source, filtered to provide a number of excitation wavebands. Suitable for exciting fluorescence.Examples of fluorescence using the spot lightWhen activating the spot light (fluorescence), the controls for the spot filters will be shown at the bottom of the panel.In the example shown, a preset combination of spot filters has been selected. The wavelengths of the excitation light are displayed: 400 - 485 nm. A spectral graph is also shown.To change the wavelength of the excitation light, click on one of the other preset combinations:This technique also uses the camera filters; in this case a 645 nm camera filter has been selected. The camera filters are automatically selected, depending on which spot filter is being used. It is possible to manually choose a camera filter that is higher than the filter automatically selected. However, normally it is not possible to select a camera filter lower than the filter automatically selected.The spot filters manually, rather than using the 11 pre-sets. By doing this, it is possible to adjust the bandwidth of the spot filter and move the band width within the visible spectrum.A B CControls A and C: Adjusts the upper and lower limits of the wavelength range.Control B: Adjusts the centre of the wavelength range.Saves the current filter as the default setting. The default filter is applied whenever the spot light is first activated.Fluorescence ScanAn automated process designed to find the optimum combination of excitation and camera filters at a chosen point on the document.Click the icon to activate. Red and blue squares will appear on screen. Click and drag these over two areas for comparison. Click ‘OK’ to begin the scan. After the scan has completed, the VSC will apply the setting that showed the greatest difference in intensity between the two locations on the image. The example below shows the two comparison squares positioned over the black ink for the ‘9’ and ‘0’ for comparison.When comparing two areas, ensure the contents of the squares are the same. For example, if comparing the black ink from the ‘9’ and ‘0’, ensure the square only contains the black ink and not any of the background printing or any other inks (if present).Bandpass filter for Infrared AbsorptionThe bandpass filter uses similar principles to IR absorption analysis performed with the flood light and camera filters. This method works by selecting a user-defined bandwidth which can be adjusted in increments ranging from 0.4 nm to 6.9 nm.Click the icon to activate the feature, the control panel will then open.The default starting wavelength is 600 nm; this corresponds to the peak wavelength of the band of light. For example, if the wavelength selected is 600 nm, the total bandwidth of light is 575 nm to 625 nm.There are various options for adjusting the wavelength.Click to increase or decrease the bandwidth in single steps. The default increment size is 3.4 nm. It is possible to alter this in the options.Click to automatically scan through the remaining wavelengths. Click the icon again to stop the scan.Altered cheque viewed at different wavelengths600 nm 650 nm 700 nm 750 nm 800 nmExaggerated Spectral ChangeThis feature uses the bandpass filter and a series of image processing techniques to exaggerate any differences in absorption that may be present in the inks on the document, as it may be difficult to see these differences normally when adjusting the bandwidth in very small steps.The bandpass filter is controlled in the same way, as before, however the images created are displayed as stored images. These stored images are created from the difference between two camera images obtained at two different filter steps.For example, if the filter is set to 600 nm when the feature is activated, clicking on the single up arrow will adjust the filter to 603 nm (if the default filter step size is selected).The resulting image will be the difference between those two images. Image processing has been applied to exaggerate the differences in pixel intensity between those two images.By clicking on the up arrow again, the next two images examined will now be 603 nm and 607 nm, then 607 nm and 610 nm, and so on.In the resulting image - the brighter the pixels, the greater the difference in intensity observed between the two images examined.The example below shows the same sample of the altered cheque. The white ‘TY’ shows the difference in intensity between the two images. The remaining numbers are much darker, indicating very little change in intensity was observed.Circularly Polarised LightTwo LED sources are available: Clockwise polarisation; Anti-clockwise polarisation.Selects clockwise or anti-clockwise polarisation.Continually cycles between the two circularly polarised lights.Example imageClockwise polarisation Anti-clockwise polarisationUltraviolet lightingThree wavelengths of ultraviolet light (UV) are available: 365 nm, 312 nm and 254 nm.The 312 nm and 254 nm sources will not operate if any of the safety flaps are open.At the top right of the display, there is a small icon of the VSC. Any flaps that are open will be highlighted in red. In the example below, the front flap is open:If either the 312 nm or 254 nm UV lights are active while the flaps are opened, the lights will automatically switch off.Example ID cardVisible 365 nm UV 254 nm UVExamining Phosphorescent itemsThe UV365 light source can be used to examine phosphorescent inks and powders. When this light source is selected, an additional set of controls will appear in the Illumination Panel.The UV light source will be switched off, and the after a short delay, the camera image will be captured and displayed as a PAUSED image onscreen. The delay between light and capture is shown in microseconds in the window next to “t= ”, and can be increased or decreased by moving the slider to the right or left. To activate the phosphorescence capture, press:Fire & Ice sample provided by Luminescence International Ltd www.luminescence.co.uk365nm UV Coloured phosphorescent reaction:10000μsTransmitted ultraviolet (365 nm)Reveals ultraviolet watermarks.German ID cardTransmitted UV feature:Repeated text “PERSONAL AUSWEIS”Transmitted FloodBanknote: 5 EuroTransmitted light reveals security featuresThe transmitted flood light provides uniform illumination for examining larger documents or features.Transmitted SpotA more intense and directed transmitted light for examining smaller areas or documents printed on thicker paper.NOTE: The transmitted light sources can be used together with the IR camera filters to reveal further evidence.Side LightingReveals raised or indented features on the surface of the document, e.g. Intaglio printing; Embossing. Click to activate the corresponding side light.The angle and height of the lights can be altered manually See: Hardware Manual (Adjusting the sidelights).Embossing revealed using side lights Collage – highlighting the replacement of the “40”Composite ImageCreates a composite image formed form the superposition of images obtained using the left and right sidelights. Click ‘Composite Image’, wait whilst the VSC takes an image of both sidelights. The result will be a stored image.There are a number of options available once the composite image has been created.• MinimumDisplays the minimum (darker) pixel values, revealing more detail in darker regions of the image.• AverageCalculates the average pixel value, reducing contrast in areas that differ in brightness.• MaximumDisplays the maximum (brighter) pixel values, revealing more detail in lighter regions of the image.• DifferenceCalculates the absolute difference of pixel values. Brighter pixels represent areas of differing brightness; darker pixels represent areas of similar brightness.Coaxial lightingReveals retro-reflective laminates: Passports; ID cards; Driving licences.Passport with a retro-reflective featureFlood lighting Coaxial lightingOVD ViewerReveals Diffractive Optically Variable Image Devices (DOVIDs), e.g. Holograms; Kinegrams. The light source comprises of two axes of LED lights, all at varying angles.Click to display the control panel:A - Selects horizontal or vertical axis (or both).B - Selects the active LED. The illumination angle of the LED is displayed. There are 7 LEDs in the vertical axis and 23 in the horizontal axis.C - Continuously cycle through all of the LEDs in the selected axis. Click the icon to start; click again to stop.D - Controls for video playback.E – Speed control. This is used when the continuous cycle feature (C) is active.An important feature of the OVD viewer is the ability to compare DOVIDs side by side. For example, a video could be recorded of an OVD on a genuine document and then compared side-by-side with an OVD on a questioned document.The following is a guide to set up a simple comparison of an OVD:Position the first document within the VSC.Open the OVD viewer feature; re-position the document if necessary to enlarge the hologram:In this example, the horizontal axis will be used.The next step is to record the current OVD as a video. In the video controls, select the record icon:NOTE: The currently selected LED and speed will not affect the recording process. After the record icon is clicked, the VSC will automatically start recording from the first LED and at a pre-set speed.Once the recording process has finished, a window will open prompting the user to save the video file. (The file type for this is always an .avi file).Once the file is saved, the VSC will ask the following:This will allow the user to save the VSC settings along with the OVD video, this is crucial for comparison purposes. At this point, click ‘Yes’.The document can now be removed from the VSC, and be replaced with the questioned document (for example).To review the video, use the video controls found within the OVD Viewer window.Rewind video back to the beginningPrevious framePlay/pause videoNext frameContinuous cycle (press again to stop)The main image will now display the video: (the green border around the image indicates that we are viewing a stored image/video)In order to do the comparison, the side by side viewing mode must be selected:This will now display the live image, and saved video side by side:The two images may not look the same as they have not been synchronised.To do this, click:This will disable the live image controls and then synchronise the live image to the same settings as the stored video. To compare the two images, use the video controls.It is also possible to create a mosaic image of the video file, so that all the frames of the video can be seen together. This function can be found in the Image Ribbon (p. 62).Anti-Stokes flashExamples of anti-stokes fluorescence Coaxial lighting1. Selects the colour to which the camera is most sensitive. See below for more information.2. Clears the image.3. Applies the anti-Stokes flash: Single flash; Multiple flash (x4).4. Enhance: Attempts to remove the noise present in the background parts of the image.Step number 1 contains three coloured boxes, and one white box. This will select which colour wavelengths the camera is most sensitive to. For example, if the green box is selected, the camera will produce the best results when examining an anti-stokes feature that produces a green emission. If the green box was selected, but this time we examined a document that produced a red emission, we may not see any results.In step 1, you can also adjust the camera gain. If you are examining a sample with weak fluorescence, selecting a higher camera gain may improve the quality of the results.If the colour of the anti-stokes emission is not known, selecting the white box will make the camera sensitive to all colours. However, the overall sensitivity will be less than the single colour options.The icon at the bottom of the anti-stokes controls allows the repositioning of the document. As the anti-stokes feature is always working as a paused image, repositioning the document is not possible. Clicking this icon will change the display to a live image and activate a visible light in the VSC. It is now possible to reposition the document. When complete, click on the same icon again to return to a paused image.Combination LightingAllows two light sources to be activated simultaneously, e.g. both side lights.Choose the first light source as normal. Then, click on the “Combination Light” icon, followed by the icon for second desired light source. Both light sources will now be active, using the exposure settings of the first light source.Note: This function is not available with certain light sources, particularly higher power sources, e.g. spotlights.Image types / Frame controlsFour types of images can be displayed, each identified by a differently coloured border:Blue: Live Image Red: Paused ImageGreen: Stored Image Orange: Mixed ImageFrame controlsThe top left corner of the frame of the image features some additional frame controls. The availability of these functions will depend on the image type. Greyed-out icons indicate that a function is not available with the currently selected image type. These are as follows:Produces a negative of the current image by reversing the colour scaleFlips the image horizontallyFlips the image verticallyRotates the image 90° in an anticlockwise direction*Rotates the image 90° in an anticlockwise direction*Activates rectangular area selection tool*Activates free-hand area selection tool*Shortcut to image processing screen (p. 37)Toggles focus assist on/off* Not available: Live, Mixed/Split images. Available: Paused; Stored.Additional Frame ControlsAt the bottom of the image frame, there are some extra features; a digital notepad and live video capture.NotepadProvides the ability to save and retrieve contemporaneous notes with an image. Click the mouse cursor in the notepad box and start typing. When the image is saved, the current notes will be saved in a file of the same name. Whenever the image is opened, the notes will automatically populate the panel, over-writing the previous contents. Any notes in the panel will remain until over-written or deleted. These notes can be used to form the basis of a report in the Working Folder (p. 87). To immediately transfer the current main image and notes to the Working Folder, click on the button on the top right of the Notepad section.Video ControlThe VSC Suite also allows for live video capture, for the purposes of demonstration or training. The video files (.avi files) can be of any length the user desires. Video capture is available in any display mode except Full Resolution.Press the red record button to start recording. The frame will flash red intermittently to indicate the VSC is currently recording. Press the record button again to stop.To play back the video, press the green play button, and press again to pause. The slider can be used to move to a specific frame, or the rewind button can be used to jump back to the beginning of the video.Capturing imagesAs well as saving images, it is possible to capture images to the Recent Images gallery panel. The 12 icon in the Image Ribbon and in the Image Modes panel both perform the same function.To capture an image, click either of the 12 icons:The image will then be loaded into the Recent Images gallery and as a stored image:To view the captured image: double-click on the image in the Recent Image gallery or click and drag that image into the main image or click .The image border will change to green, indicating that a stored image is being viewed.To return to the live image, click in the Image Modes panel or in the top right of the screenSaving Images (Save as...)Use the ‘Save as...’ icon in the File Ribbon to save any image currently being displayed in the main image. The “Save Image” function is also in the shortcut menu.A window will open, allowing the user to select the desired location, name the file and select the desired file type.If in Live+Stored mode, an option will appear to save both images as one file.IMPORTANT DIFFERENCES BETWEEN SAVING AND CAPTURING:Using the ‘Capture’ feature will only temporarily capture the image to the Recent Images gallery. No file is saved on the computer itself. If the image is removed from the gallery, that image is lost and cannot be recovered.Using the ‘Save as...’ feature will save the image to the computer, but not load the image into the Recent Images gallery. However it is possible to then load the image into the gallery by using ‘Open...’. If that image is then removed from the gallery, the image is still saved on the computer.Recent Images galleryThe Recent Images gallery contains the most recently captured or loaded images in the current profile. The gallery can contain a maximum of 50 images.If the gallery is full, when attempting to capture a new image or load an image, the following message will appear (on default settings):By clicking ‘Yes’, the new image will be loaded in the gallery and the oldest image will be removed. However, from now on the VSC will no longer prompt to delete the old image in this profile, this will then be done automatically.This is indicated by the tick:The default setting for this icon is un-ticked, meaning every time the gallery is full, the software will prompt to delete the oldest image.The following icons allow printing, deletion or saving of multiple images in the gallery:Either manually select images in the gallery (by ticking the box in the top left of each image), or select all images by clicking , then click the desired function e.g. Save.Position on ScreenCreates a mosaic of a maximum of four stored images. Click on the corner of the icon to specify the position of the image. Double-click on the required image in the Recent Images gallery to display the image in the mosaic.Display images in the other corners in the same way.To return to the normal display mode, click the red highlighted corner to deselect it. Now any loaded image will appear in full.Image OptionsRight clicking on any image within the Recent Images gallery will display a menu of options:Show image settingsOpens a new window which displays all of the VSC settings for that image.Apply Image settingsChanges the current VSC settings to match those of the selected image in the gallery.Save as ...Allows the saving of the selected image.DeleteRemoves the selected image from the gallery.RenameRenames the title of the image in the gallery.Print ImagePrints the selected image.Image Modes PanelThe Image Modes panel provides a number of controls for viewing and comparing two images.Position 1Switches the view to image 1. This is normally the live image, but can be made to show a stored image (see below). If the image shown is live, the number 1 will be blue. If the current image in position 1 is a stored image, the number 1 will green.Image CaptureThis button will capture the current live image to the Recent Images gallery, and also make it image 2.Position 2Switches the view to image 2. This will be a stored image from the Recent Images gallery.Image sourceSpecifies the destination store of the stored image. Default = 2.Ticking the box on the left will make the next stored image appear in Store 1, causing the number 1 to become green instead of blue. This therefore allows for the comparison of two stored images.All future stored images will go to position 1 until the box on the right is ticked again.Split ImagesSplit (Horizontal)The horizontal split divides the image in two sections along the horizontal plane. The top half is the current live image (1); the bottom half is the stored image (2):Split (Vertical)The vertical split divides the image in two sections along the vertical plane. The left half is the current live image (1); the right half is the stored image (2):Additional controls are available when using the split image modes:Swaps the split order, so that the image in position 1 is in the bottom/left half, and the image in position 2 is in the top/right half. Click once to activate, and click again to return to the original setting.Adjusts the proportion of the split in the mixed image. Moving the slider to the left will show more of image 1, while moving it to the right will show more of image 2.StrobeContinuously cycles the display between image 1 and image 2.Adjusts the speed at which the display cycles. The coloured number indicates which image is currently being viewed.Mixed ImagesThe third row buttons in the Image Modes panel allow for the superimposing of live and stored images.Image 1 Image 2Mix (1+2)Superimposes image 2 on top of image 1. No colour effect is used.DifferenceSuperimposes a negative of image 2 on top of image 1. Areas where the images are an exact match are displayed in grey.Red/Green Mix (1+2)Superimposes image 2 on top of image 1. Image 1 is given a red wash, while image 2 is given a green wash. Where the two images match, normal colour can be seen.The default setting is a 50:50 mix, but it is possible to alter this using the following controls:Repositioning Image 2 (Stored Image)To make a better comparison of image 1 and image 2, it may be necessary to reposition the images to make them match. This can be done digitally. Click on the ‘hand’ icon (as above). Image 1 will be paused if it is live, and the following instruction box should appear:Image 2 can be moved and rotated using either the mouse and mouse wheel, or the cursor and plus and minus keys. Once satisfied with image 2’s position, clicking the ‘hand’ icon a second time will leave this adjustment screen, with image 2 in the new position, and image 1 will no longer be paused. To abandon any adjustments, right click on the image instead. Once adjusted, image 2 will stay in the new position until it is reselected from the Recent Image gallery.Image 2 can also be repositioned by matching 3 fixed points on both images. The Align function can be found in the Image Ribbon (p. 62).Capturing Mixed ImagesWhen using the image comparison tools, a mixed image is created, indicated by the orange frame. It is not possible to use the 12 icon in this case, as this feature is only used for capturing live images (the 12 icons will be greyed out).Instead, use the following icon from the Image Ribbon (load what you seen into Recent Images). This will load the currently viewed image into the Recent Images gallery.When viewing a mixed image, the ‘Save as...’ option is still available.Tools RibbonThe Tools Ribbon shown is from the Advanced workspace, as it contains all features. Please note that in other workspaces, the number of functions will be reduced.ResetResets the software to the last saved profile settings.Make Annotation PermanentIf there are any ‘live’ annotations on the image, clicking this icon will ‘flatten’ them, so that they become a permanent part of the image. This button must be clicked if the annotation is to be saved as part of the image.Image ProcessingThe Image Processing area of the software provides a variety of different functions and filters for enhancing or improving characteristics in a selected area of the image. Clicking on the icon will initially pause the live image and bring up an onscreen prompt:Here, you are instructed to select an area of the image using an area selection tool from the image frame controls (p. 28). This selected area is what will be processed. Clicking ‘OK’ with no area selected will apply any processing to the whole image.Once an area has been selected, the Image Processing window will appear. This window can be maximised to full screen if required. There are 2 image viewing panes; the original image (left) and the result of the current processing function (right). The current processing function can be applied to the Original image by clicking on the double arrow button ( ). The Result pane will only show the result of the current processing function on the Original image. Changing function tabs will change the Result image, and the processes do not appear as cumulative in this pane. To see the effect of multiple image processes, they must be applied to the Original image individually. The processes will not be applied to the main image in the main VSC screen until ‘OK’ is clicked, which will also close the Image Processing window. ‘Cancel’ will close the window with no changes applied, and ‘Reset’ will return the Original image to its state when the window was first opened.There are 8 different function tabs; Contrast, HSL, RGB, User filter, Equalization, FFT, Gamma correction and Sharpen.Document Database & Currency DatabaseNOTE: Below demonstrates how to operate the Documents Database. The Currency Database functions in the same way.The database can be divided into two types of entry:Keesing DatabaseA commercially purchased library of specimen images. Images are available that are captured using: White light; UV 365 nm; Transmitted white light; IR 780 nm.User DatabaseAllows users to generate their own document and currency database, using all the light sources, filters and magnification available on the machineREAD ModeThe document database viewer allows for the search and comparison of any images within the database. This can be the Keesing Reference database, or any user created databases.NOTE: If you have not purchased the optional Keesing Database, then there will initially be no entries in your database. The following instructions are the same for Keesing and user entries, but require the database to be populated (see WRITE Mode below)The database viewer window has a selection of tabs at the top. The main tab is the ‘Selection’ tab, which displays all of the database entries for the various document types.To display the information for particular document, first select the relevant document type in the drop down menu:Then select the country from the drop down menu:The countries are listed in alphabetical order in one of two ways:• Clicking “ICAO” will arrange them according to their ICAO short code• Clicking “Country” will arrange them according to their full nameIf the ICAO short code for a country is known, then this can be typed into the window at the top showing the current country code. The country will only change if there is an entry for the chosen document type on the database.A list of all the entries in the database for that document type and country will be displayed in the box to the right.Select the appropriate document and all of the images from that document will be loaded into the gallery at the bottom of the database window.Move the mouse over the thumbnail images displays the image in the Stored 2 window (as the VSC will automatically switch to the side by side viewing mode when the Database Viewer is opened). The image will change when the mouse is moved over the images if the preview option is ticked. If this is un-ticked, click on each image to load the image into Stored 2.There are further options on the right hand side of the panel.These icons control the way the images are displayed in the Stored 2 window.Certain parts of the image can be removed to enlarge other parts as in the following example.An image of the inside rear spread of the 2010 British passport has been loaded into Stored 2.Clear the right hand page:: Rotate the image:NOTE: By performing this function, the right hand page has not been deleted. To reopen the original image, click on the image thumbnail at the bottom of the Database Viewer window.Select the ‘Document Data’ tab to show information about the currently selected document:Select the ‘Setup’ tab to display various options for the database viewer:Database pathThis displays the location of the database files on the PC.Database usedTick to enable the selected database. If an entry is not ticked, those database entries will not appear in the database viewer. Only licensed databases can be selected.WRITE ModeUsing the database write mode, it is possible to add new images and information into the database.First, open the database as before.Place the document to be added into the database in the Live 1 image (left). The image displayed in the Live 1 window will be the image saved into the database, so ensure it is focused and of good quality.: Click to activate the Write Mode of the database.• Select the document type from the drop down menu.• Select the appropriate country.• If this entry is for a new document, ensure ‘New Document’ is selected. The ‘New Document Number’ and ‘New Image Number’ will automatically be assigned.• Select the ‘Page Type’ of the document, and page number if applicable.• The ‘Illumination’ field will automatically be assigned to match the currently selected light source.Open the Document Data tab to add further information:Within this tab, information related to the appearance, validity etc., can be added.If this tab already contains information (relating to the previously viewed/added document), click to clear all of the fields, or click within the desired field to edit.The ‘Summary’ entry is important, as this is the text that will display in the list of possible documents in Read Mode. Adding a year of circulation helps to distinguish between entriesTo save the document image and information, clickA confirmation message will appear, click ‘Yes’ to save.NOTE: Only one ‘Document Data’ tab is created per document entry.Return to Read Mode, select the relevant document type and country, and check the entry has successfully been added into the database.Notice that this entry has a ‘U’ beside the name. This indicates that this entry is a user created entry. A ‘K’ indicates a Keesing database entry.Adding images to an existing user entryFirst, set up the desired image to be added in the Live 1 image (light source, filter, etc.).Enter the Write Mode of the database as before, however this time select ‘Add to Current Document’:Select the appropriate entry from the list of existing documents (this can be found by looking at the entry in Read Mode). In this case, it is ID number 5.Select the Page Type and Page Number as before.Click to save this new image into the existing entry:Enter Read Mode to check the new image has been added:To delete images from existing database User entries, right click on the relevant image and select ‘Delete’. The ‘Edit’ function on the right click menu allows you to edit the page type.NOTE: Only User created images can be deleted/edited. Keesing images cannot be edited or deleted (if installed). It is not possible to add images or information to Keesing entries.To edit the information in the Document Data tab, click ‘Edit’ at the bottom of the window. Click the save icon to save the new information.To delete entire entries created in the User database, click when in the ‘Selection’ tab. This will delete the current entry, including all images and data saved within that entry.Invisible Personal Information (IPI)IPI encoded personal information occur in some passports and other identity documents. It normally features as hidden text within the document holder’s photo on the bio data page.Click the IPI icon to activate the feature. This will open the IPI Settings control panel.A portion of the live image will now appear scrambled; this is the portion that is being enhanced. In this example, a passport photo is being examined. Position the photo within the enhanced area, so that the edges of the photo are parallel with the edges of the enhanced area:Use the Lens Pitch and Lens Angle controls to reveal the IPI.Tips for revealing IPI featuresAdjust the Lens Angle slider to create strong black and white banding, moving the slider to the point where the bands become as wide as possible. The arrow buttons either side of the slider can be used for fine control. This will also cause the bands to rotate.Repeat the same process for the Lens Pitch. It may be necessary to return to the Lens Angle control for further fine adjustment.Once the bands are at the furthest possible distance apart, the IPI information will then be visible:A small list of pre-sets can be found at the bottom of the panel, examples of various documents that have IPI features. Each pre-set will have the appropriate settings to reveal the IPI in the relevant document.It is also possible to add a custom pre-set for documents that may not appear in the list already.Add PresetEnsure the lens pitch and lens angle are set correctly for the relevant document, then click ‘Add Preset’.Enter a country code for the document e.g. PRT. This can be suffixed with a number, to differentiate between multiple pre-sets for the same country.Enter a description for the document e.g. Portuguese 2006 Passport.Click OK to confirm these details, or CANCEL to abort the entry.DeleteClick to delete the currently selected pre-set.UpdateExisting and user created pre-sets can also be updated.First select the desired pre-set.Change the Lens Pitch and Lens Angle to the new settings.Click “Update”.Now the pre-set will be saved with the new settings.EnhanceWhen activating the IPI feature, the enhance tool is activated by default. De-selecting this feature will produce an image similar to viewing the document visibly with a decoding lens. It is advised that this feature is enabled when attempting to reveal the IPI features.The VSC will select a pre-set magnification when using the IPI feature, which has been optimised for viewing passport photographs. If regularly using a different magnification, first set the desired magnification, and then click the following icon:The VSC will now apply the new magnification setting when the IPI feature is activated.Optical Character Recognition (OCR)The OCR feature reads the information within the Machine Readable Zone (MRZ). These are found within many documents including passports, visas and identity cards. The function will work on Stored or Paused images of sufficient quality.Activating the OCR feature will perform the following functions automatically:• Opens the OCR control / information panel.• Selects the 780 nm camera filter.• Adjusts the magnification to a pre-set setting.• Positions a green box at the bottom of the live image.• Place the document so the MRZ is within the green box at the bottom of the live image:The magnification will be adjusted automatically to suit passport examination. The magnification can also be adjusted manually so that the MRZ on smaller documents fits within the green box.The OCR software reads the characters within the green box and the MRZ information displayed in the relevant fields.If some characters are not read correctly, adjust the level control as required.If any of the MRZ characters are continuously being read incorrectly, it is possible to manually enter the MRZ data instead.Click to allow the manual entering of characters. Click ‘OK’ to finish this process.e-Passport Reader: (If applicable).Some documents contain an RFID (Radio Frequency Identification) chip. Passports that have this chip have the e-passport logo on the front cover. The chip reader is an optional extra, and must be attached to the PC before opening the VSC software.To read the chip, click on the e-passport icon then follow the on screen instructions. You must place the document on the chip reader before clicking ‘OK’. If the MRZ on the document matches its counterpart on the chip, the image will appear in blank image area. The user can then choose to save or print the image and bio data, copy the data to clipboard, copy the image to clipboard or send the image and information directly to the Working Folder (p. 87).Note: Before attempting to read the e-passport chip, the MRZ data must be successfully read first, as detailed above.LetterScreen++®An optional feature that appears as part of the OCR window. For a document that has a LetterScreen++® feature, read the MRZ as detailed above.Once the MRZ has been recognised, click the LetterScreen++ button. This will return the live screen to a colour image, and display the instruction prompt:Following the instructions, locate the LetterScreen++® feature and click on the top left corner. The prompt will then ask you to click on the bottom right corner of the feature. A green box will be drawn around the area you have selected, and the software will now check to see if the pattern matches the MRZ data. This may take a few moments.Once checking has finished, the result will be displayed underneath the LetterScreen++® button. This will either be a green “PASS” or a red “FAIL”.The four coloured buttons on the left will make the software particularly sensitive to images of the chosen colour. This is to can be used when attempting a re-read of a failed image. In the example above, the default multi-coloured has been selected, but equally the cyan button could have been selected before starting the process.Latent Image ViewerAn image processing feature for enhancing latent images on documents.Click the icon to activate this feature. The VSC will automatically adjust the zoom to a predefined magnification for optimal viewing of the latent images. If necessary, adjust the magnification manually. Always make sure the image is in focus to achieve the best results. Increasing the Sharpness setting on the Camera Ribbon may also help.Below is an example of a latent image in the 2006 British passport, with the latent image viewer disabled (left image) and enabled (right image).Click the latent image viewer icon again to disable the feature.This function will work on Stored or Paused images of sufficient quality.Barcode ReaderThe barcode reader is a tool for reading both 1D and 2D barcodes found in many documents.Before activating this feature, position the document in the VSC, magnifying the barcode and adjusting the focus if necessary. Click the barcode reader icon to activate, and any barcode(s) should be highlighted. The barcode reader is capable of reading up to nine barcodes simultaneously. Each barcode will be highlighted in a different colour.The Barcode Reader toolbox will be displayed:Click to re-read the barcode if you have repositioned the document..Save barcode data as a text file.Print barcode data.Copies the barcode information to the clipboard.Displays the barcode information on the image.Makes the barcode information permanent on the image, so will be included when capturing or saving the image.There may be instances where the barcode is not being automatically detected. In this case, slowly adjust the slider to vary the sensitivity until the VSC detects the barcode. Drag the slider a small amount and then stop to allow the software to attempt another read.The barcode type will be displayed, and it is also possible to display the barcode information in various formats (ASCII, HEX or HEX+ASCII).For each barcode detected by the VSC, there will be a tab of the same colour i.e. Barcode 1, Barcode 2. Click each tab to show all the information contained within that barcode.The image below shows the result of displaying the barcode information as part of the image. The size of the text can be adjusted in the Annotation & Measurement Ribbon (p. 69). Once it has been made permanent, no further adjustment may take place.This function will work on Stored or Paused images of sufficient quality.Auto ExamineAuto Examine provides a method of automating a series of user-defined examination techniques, providing a preview result of each setting. These automations can be saved as templates, and instantly re-opened by any user to run the same sequence.In this example, a suspected alteration on a cheque is being examined.Click on the auto-examine icon to open the Auto Examine window:: Click to display the Examination Matrix:The matrix displays every combination of light source and filter: Total = 471 combinations. To select a particular combination, click the box where the lines of the desired light sources and filters meet.Click to activate the auto-examine sequence.The VSC will then cycle through all of the pre-selected light sources, producing a preview image for each setting:Auto-examine sequence (17 camera filters and spot filters)A preview image for each setting is now created, allowing easy and simple viewing of all the pre-selected light sources.After the process has completed, the VSC will always return to the flood lights.Clicking on a preview image will apply the settings for that image to the live image.: Click to return to the main VSC screen with the current settings applied.: Performs the same function as though higher resolution images will be saved to a folder determined by the user.There are two options for saving the thumbnail images:: Saves all the thumbnails to a single image file:This will save each thumbnail as a separate file:Auto Examine Matrix ControlsOpens any saved matrix examination template.Saves the current matrix as an examination template.Selects all boxes within the examination matrix.De-selects all the boxes within the examination matrix.Applies an F+F generic pre-set, which covers the most commonly-used light sources and filters.Hyper Spectral Imaging (HSI)The HSI feature uses the band pass filter to record a sequence of images over a range of wavelengths, known as an image stack. This image stack can be examined in various ways to reveal differences in absorption and reflectance behaviour.After selecting the HSI feature, the HSI Control panel will open.Before performing any HSI examinations for the first time, the optimum camera exposures need to be determined. To do this, first place a blank white sheet of paper in the VSC (it is also advisable to have the magnification set to an appropriate setting for the document you wish to examine).Click to start the process, and follow the onscreen instructions.The process will take approximately ten minutes to complete.NOTE: This process does not need to be performed each time the HSI feature is used. Repeat if the results are becoming over or under exposed, or the magnification is significantly changed.Now remove the white paper and place the document for examination.The next step is to choose the range over which the HSI will examine the document. This is done by adjusting the ‘Start’ and ‘End’ position sliders (labelled 1 and 2 below)The total number of images recorded will update as these sliders are adjusted.The second step is to select the band pass Filter Steps.The default position is 4 nm, meaning that an image will be recorded every 4 nm, for the total range selected in the previous step.Selecting a smaller filter step will increase the total number of images in the stack, and improve the resolution of any spectra obtained.Selecting a larger filter step will reduce the total number of images in the stack, and reduce the resolution of any spectra obtained.First select the range of examination and the filter step size.: Click to start the HSI process.In this example, 226 images have been taken from the range 580 nm to 805 nm (Step size = 1 nm).A thumbnail of each image is displayed down the left hand side of the screen (where Recent Images normally appears).: Click to load the HSI data in the main image. The display will become a stored image.Use the slider (labelled 3) to scroll through all the images in the image cube over the preselected range, to show (if any) changes in the absorption/reflection of features on the document.Saving HSI dataWhilst using the HSI feature, clicking will save the HSI data, not any images viewed/loaded into Image 1.To save, click the save icon, then name the HSI RAW data as desired.Loading HSI dataTo open any HSI data, first activate the HSI feature THEN clickBy activating the HSI function first, only HSI files will be selectable in the open window.Using the Spectrometer in HSIThe spectrometer function can be used with the HSI data. The function is slightly different to that of the main spectrometer (see p. 72)Click to activate the feature. The VSC will automatically switch to Live+Stored mode, where the right hand image will be the spectrometer graph.In this mode, it is possible to reposition the crosshairs. Click and drag the crosshairs to an area for analysis. A spectrum will be produced by analysing that area throughout all images in the cube.It is also possible to select absorption or reflectance prior to capturing spectra.The spectra will update in real time in the spectrometer preview graph, note the range of the spectra will only be the range selected previously before recording the HSI data (in this case 601 nm to 801 nm).: Click to capture the spectra (and name). These spectra will now appear in the graph on the right hand image.Click to access the spectrum screen. Within this screen, exactly the same features are available in the Spectrometer (see Spectrometer Ribbon, p. 72).Click ‘Finished’ to exit the HSI spectrometer mode. The display will remain in Live+Stored mode and will need to be switched back in the Image Ribbon.False ColourApplies false colour processing to the image.Areas that have differences in spectral response will be displayed as different colours.Adjust to optimise the results.Mark Similarly Spectral AreasAttempts to colour all pixels on the image that have similar absorption behaviour, analysing all images in the cube.In this example, the ‘0’ has been coloured red by clicking multiple times in that area. The colour was then changed to blue (in the annotations and measurements panel), then the remaining ink was coloured using the same method.RulerAllows calibration of the measurement function. See also: p. 71.Fluorescence ScanSee p. 15.Measure ShadingThis function is particularly useful when capturing images at high magnification, or through a microscope via an External Camera, as it allows the software to compensate for any shadowing that may naturally occur. Change magnification to the desired value. Clicking on Measure Shading will cause a prompt to appear on screen:As instructed, insert a white piece of paper into the examination area and click “OK” to measure the required shading compensation. The “Apply Compensation” button is now available. Remove the white piece of paper, and apply the compensation to your subject matter. This will pause the image.Isolate ColourClick on the desired colour button (red, green or blue). This will pause the live image and apply a filter to isolate the relevant colour component from the current image. For example; clicking on red will show any areas that contain red, including purples, magentas, oranges and yellows.Remote Viewing(Requires a network connection). Allows remote viewing of images captured on another instrument and sent via secure intranet or electronic drop box. See: p. 82.Banknote AreaCompares the sizes of banknotes. Sizes are displayed as percentages. A list of sizes must first be created by the user for the function to work.Adding notes to Banknote Area listClicking on the Banknote Area button will cause the following window to appear, and the magnification to change to a pre-set value. Do not adjust the magnification.Make sure the banknote is in the centre of the examination area, and is as flat as possible. It is important that there are no other visible obstructions in the field of view.Click on button “1”, pictured above. This will cause the Transmitted Light to activate, so that the software can calculate the dimensions of the banknote, based on its silhouette. When you are satisfied with the capture, press button “2” to add this as a pre-set in the dropdown list. You will receive a prompt for you to write in a description of the banknote you have just sampled (for example “€5” or “5 Euros”). Alternatively, pressing the red “X” button will delete the selected entry.Comparing banknotesPlace the questioned banknote into the examination area as above. Choose a set sample banknote to compare against from the dropdown list on the left of the panel. Press the button that has the question mark under a banknote. The VSC will switch to Transmitted Light to capture the silhouette of the questioned banknote, compare it with your chosen sample banknote, and then express the area of your questioned banknote as a percentage of the sample (i.e. “95%” or “112%”).Image RibbonCopy into storeSee p. 29Recent ImagesSee p.36Best ImageAttempts to improve the quality of the live image as follows:1) Adjusts the camera controls by selecting a smaller iris, therefore producing a sharper image;2) Attempts to remove image noise by averaging several frames.This feature is particularly useful when viewing fluorescence, where Auto Exposure would normally seek to increase iris size over the integration time to produce a brighter image.Click the icon to perform the function, wait until the process has finished. The live image will now be paused (the result of the averaged frames).The image can then be captured or saved as desired.MegaPixel CaptureSix advanced imaging modes are available. Make the required selections. Click ‘Continue’ and follow the onscreen instructions. ‘Double resolution’ and ‘Frame averaging’ are available only for certain modes.ID3 60 Mpixel imaging (compressed)Captures a high resolution image of an entire page of a passport-sized document. The function uses the bandpass filter to generate tri-colour illumination (R, G, B) and the XY stage.The user is prompted to close any open flaps before continuing. The camera will automatically zoom to the appropriate level and the linear bandpass filter will be activated. The following message will appear to prompt the user to optimise the focus and integration time. The user should also ensure that the document is correctly positioned before clicking “OK”.Upon completion of the process, the user must save the file to a specified location.ID3 Image stitchingThis mode is applicable for passport-sized documents and is designed to capture an entire information page of a passport at a higher magnification than ordinarily possible. The required light-source and any applicable filters should be selected before entering this mode. Once selected, the magnification and the XY stage will be adjusted automatically and an information box, such as the one below, will provide the user with instructions.The software then produces a composite image from 5 different positions during which a window similar to the one below will appear.The window will close on completion of the process and the user is prompted to save the file to a specified location on the PC.A4 Image stitchingThis mode allows the user to capture an entire A4 document as a single image. The required light-source and any applicable filters should be selected before entering this mode. Upon selection, the user is given the option to apply shading compensation to help provide even illumination when the white flood light is used.Once selected, the following instructions will appear, prompting the user to insert a sheet of white paper.The user should then follow additional instructions regarding the positioning of the document. On completion, the user is prompted to save the file to a specified location on the PC.Sub pixel stepping (19 Mpixel)This mode utilises the XY stage to move the document the equivalent of a half-pixel in a square-like motion. Upon activation, the user is prompted to position the document, at which point the focus and zoom can be adjusted as necessary. The software will then take multiple images and combine them to produce a single image of high resolution.Three colour imagingThis mode is used to reduce any longitudinal chromatic aberration effects. Frame averaging can be selected in order to reduce any background noise that may be present. Upon activation, the linear bandpass filter is automatically controlled and the diffuser is employed to illuminate the sample with red, green and blue monochromatic light. Since discrete wavelengths of light have different focal points, the operator is prompted to optimise the focus during the process. If the double resolution option is selected, on completion of the process, the user is prompted to save the file to a specified location on the PC.RAW Pixel steppingThis mode utilises the XY stage to move the document the equivalent of one pixel in a square-like motion. This results in each point of the document being imaged by a red, green and blue pixel of the camera sensor. Frame averaging can be selected in order to reduce any background noise that may be present. Upon activation the user is prompted to position the document, at which point the focus and zoom can be adjusted as necessary. The software will then take multiple images and combine them to produce a single image of higher colour resolution. If the double resolution option is selected, on completion of the process, the user is prompted to save the file to a specified location on the PC.Focal plane mergingCombines multiple images taken at different focal points. The end result is a single combined image with a greater depth of field. When this feature is selected, an instruction box will guide the user through the process.Copy image to clipboardCopies the image to the clipboard, which allows the user to insert it into an alternative software applicationMoreClicking on the toolbox opens up the following post-processing options:De-speckleReduces noise and smoothes an image.FlattenAttempts to correct for non-uniform illumination.AlignThis feature uses three points to align a stored image to a live image or another stored image, to assist with visual comparisons such as performing overlays etc. The operator is instructed to click on three far-apart features in the live image and then click on the same features in the stored image. It is important that the features in the stored image are selected in exactly the same order.RotateRotates the image approximately 90 degrees each time it is selected.CropSelects a part of an image to be cropped. The user is then given the option to increase the cropped image to fill the display.Create Mosaic from VideoCreates a mosaic of the all the individual frames of a video as one image. It is available for any .avi video file (e.g. from the OVD Viewer), but requires the video to be loaded into and selected from the Recent Image gallery. The more frames there are in the video, the smaller size and greater number of tiles in the mosaic image. The resulting image can then be captured or saved as desired.Camera channel selectorColourDisplays an image based on the combined RGB colour channels.Pseudo-colourDisplays a greyscale image as a pseudo-colour image according to the reference scale shown below. Whites are represented as magenta or red, mid-greys are represented as greens, and blacks are represented as blues.MonochromeConverts a colour image to greyscale and preserves the luminance.Red/Green/Blue ComponentIsolates the relevant channel of a colour image and displays it in greyscale.BrightestA modified function based on monochrome. It further enhances the luminance.OverlaysThe operator can select the following overlays to assist with the alignment and measurement of features:RulerPopulates the top and left-hand edges of the screen with 1 mm and 1 cm graduated markingsGraticuleA grid of horizontal and vertical lines spaced 1 cm apart. The central horizontal and vertical lines are further graduated at 1 mm.Typewriter GridAllows the operator to specify the horizontal and vertical spacing in mm. These custom grids can be saved as pre-setsCross hairsSpectrometer crosshairsDisplay ModesSee p.4Digital magnificationSee p. 10Annotations and Measurements RibbonThe annotations toolbar allows the addition of text and various user defined markings on an image. Click the ‘Annotations and Measurements’ menu to view the annotations toolbar:Select toolUse to select existing annotations, to edit or delete.Draw LineDraws a single straight line.Draw Multi-Point Line/FreehandUse single mouse clicks to draw a multipoint line, hold mouse click to draw freehand. Double click to finish.Draw ArrowDraws a single arrow pointed line.Add TextFirst draw a text box (rectangle) in which the text will be added. Type desired text, press enter to finish. Right click the icon to open the font options.Draw RectangleDraws a rectangle.Draw EllipseDraws a circle or ellipse.Selects Feature onto White BackgroundTemporarily Measure DistanceMeasures distance and displays value only when mouse button is still clicked.Measure DistanceMeasures distance and displays value permanently on image.Measure AreaMeasures selected area. Adjust sensitivity with slider control found in the middle of control panel.Measure AngleClick three times, with the second click being the apex of the angle measured.Measure RadiusClick three points on the circumference of the circle.Customised GridCreates a user defined grid of parallel lines.Pixel ValueMeasures pixel values at two locations indicated by red and blue squares.Line GraphMeasures the pixel intensity along the desired horizontal line. The graph is displayed on the image, click at different positions on the image to change the position of the horizontal line being measured.Ruler (Calibration)Allows for the custom calibration of measurements. You will need an item of known length. Follow on screen instructions after clicking. This will only affect the current profile. See also: p. 60.Make Annotation permanentAfter annotating the image, click this icon to make all annotations permanent, when the image is saved, all annotations will be saved as part of the image.Colour selectionLeft click a colour to select the primary colour; this sets the colour of the main annotations or measurements.Right click a colour to set the secondary colour; this sets the background colour used in some annotations.Font selectionOpen templateSave templateSpectrometer RibbonThe spectrometer ribbon contains all the features relating to the use of spectrometer. This includes taking a white reference, setting exposure time, capturing spectra and viewing the Spectrum Screen.The spectrometer displays a graphical plot of light intensity against wavelength (400-1000 nm).It can be used with a variety of light sources, for example:• Flood light – measuring reflection or absorption spectra.• Spot light – measuring IR fluorescence spectra.• UV lights – measuring UV fluorescence spectra.• Transmitted light – measuring transmitted spectra.The following is an example of taking spectra using the flood lights (absorption and reflection).Select the Spectrometer ribbon, and click the ‘Start’ icon to activate the spectrometer.Follow the instructions that appear on screen, first adjusting the magnification:Adjust the magnification to a suitable level for the document. Selecting a larger magnification will allow for easier selection of samples to measure. Click ‘OK’ when done.Next, a white reference needs to be taken:Click ‘OK’ when done.Now position the document so the desired area for examination is under the cross hairs, for example:Click ‘OK’ to commence taking a spectrum.The panel below shows the spectrometer preview window:The red bar at the top indicates the spectrometer is live, the spectrum will continuously update until it is recorded or paused.The graph above shows the absorption spectra of the number ‘9’ in the image at the top of the page.To record the spectrum, click the ‘copy graph to spectrum screen’ icon, then enter a caption for this spectrum.To view the spectrum within the spectrum screen, clickIMPORTANTWhen returning to the main screen from the spectrum screen, the spectrometer will now be paused.To resume recording, click in the spectrometer toolbar.The spectrum of the ‘0’ will now be taken:Follow the same steps as before. Once completed, go back to the spectrum screen..The two spectra from each sample of ink can now be compared.For a more reliable comparison, multiple spectra from each ink should be taken. In this case, a total of three spectra from each ink have been taken. These six measurements have been made in the absorption mode.The spectrum details list all of the recorded spectra:1) Spectrum colour. Click on the coloured line to change the colour if desired. Or drag over multiple lines to change the colour of multiple spectra.2) Tick to make individual spectra visible, un-tick to hide.3) Spectrum type. ‘Ref’ indicates a reflectance spectrum; ‘Abs’ indicates an absorption spectrum. For remaining spectrum types, see key below the spectrum details table.4) Spectrum title. Click until text is highlighted to edit/change title.5) Tick to make all spectra visible.6) Tick to hide all spectra.At the top of the screen, there are various tools and options available:Returns to the main screen.Print. Click the drop down arrow to change which information is printed.Open previously saved spectra.Save. Click the drop down arrow to choose which information is saved. Clicking the icon itself will save all information.Copy to clipboard. Click the drop down arrow to choose which information is copied. This information can then be pasted into any external software e.g. Word, Excel, etc.Opens the working folder.Delete selected spectra. Spectra must be highlighted red in the spectra table.Delete all spectra. This will clear the entire table. There will be a confirmation prompt to prevent accidental deletion of all work.Spectrum processingDifferenceSubtracts corresponding intensity values in two selected spectra.Rate of ChangeCalculates the rate at which intensity changes with wavelength.NormaliseApplies a normalising procedure to two spectra of the same type. The normalise function identifies the spectrum with the smaller intensity range and then stretches and shifts this graph to match its maximum and minimum values to those of the other graph. Normalised spectra will be indicated by an N in the spectra title.Undo NormaliseResets the normalised graph to its default. Select the normalised spectra, then click this icon to undo.AverageFirst select the appropriate spectra (click to select, click again to de-select if desired). Then click the average icon.A new graph will be created, which is the average of the selected spectra. A new entry will be made in the spectrum details list (Ref Av), and the graph below.It is recommended that the raw spectra data is kept along with any averaged spectra.The right hand side of the spectrometer screen shows the chromaticity co-ordinates and chromaticity diagram.Chromaticity co-ordinatesThe chromaticity co-ordinates provide a numerical measure of colour.• X, Y and Z represent the tri-stimulus values.• x and y represent the co-ordinates in the chromaticity diagram (when the 1931 x,y option is selected).• u and v represent the co-ordinates in the chromaticity diagram (when the 1960 u,v option is selected).• L* represents the luminosity of the sample. Ranging from 0 (black) to 100 (white).• a* and b* represent the colour. a* - negative values indicate green while positive values indicate magenta. b* - negative values indicate blue and positive values indicate yellow.Additional optionsCIE Table ColumnsRemoves/adds the relevant columns from the chromaticity tableCIE diagram typeSelect to display the 1931, 1960 or 1976 CIE diagram typeViewing AngleThis simulates the effect of the CIE Standard ObserverIlluminantThis simulates the effect of various standard illuminantsZoom ControlsThere are zoom controls for both the x and y axis. Use the zoom slider to adjust the zoom, then the wavelength slider to view the relevant wavelengths.Chromaticity diagramThis displays the colour space of the associated chromaticity co-ordinates. Points are displayed on the diagram corresponding to the entries in the chromaticity co-ordinates (x and y, or u and v).Highlighted spectra in the chromaticity co-ordinates table will cause the corresponding point on the diagram to flash.Below the diagram is the colour indicator, displaying the same value as in the chromaticity co-ordinates (in this case 66.3). The position of the slider represents the colour as perceived by the spectrometer.Other Spectrometer ControlsMeasure white referenceMeasures the white reference.Record Spectrum/Pause recordingOnly one control will be available at any time.IntegrationIncrease/decreases the integration time to increase/decrease the sensitivity of the spectrometer.Reflectance/AbsorptionSwitches between reflectance and absorption. This will only work when paused.ScalingFor measuring fluorescence, this can normalise peaks or simply scale them for meaningful comparison.Make crosshairs part of imageEmbeds the crosshairs into the image, so that a visual record can be kept of the location of a feature. Selecting this will pause the image. The colour pallet allows the user to select an appropriate colour of the crosshairs.Copy into StoreCopies the current image to the Recent Images gallery.StopExits the spectrometerNOTE: Any unsaved data will still be available if the spectrometer screen is accessed after exiting, UNTIL the software is closed. Then any unsaved data will be lost.File RibbonThe File Ribbon houses functions that relate to saving or retrieving items to or from disk. It is also where you will find options for personalising a profile, help facilities and tutorials, as well as importing an external scanner.ExitExits the software. A prompt will appear asking for confirmation.ImageProvides a number of functions:• Import an image from a desired location into the Recent Images gallery (Open)• Save the current main image to a location of your choice (Save)• Print the current main image (Print, greyed out unless a printer is attached to the PC)• Search for a particular file (Search)These functions behave just as you would expect them to in Windows or similar operating systems.You can import a variety of files types into Recent Images, including .pdf files. The imported image will also be loaded into the main display image. If the image has an associated VSC settings file, you will be asked if you wish to apply those settings.The VSC Suite allows you to save images in a number of different file types, including TIFF, RAW, .pdf, .bmp, .jpg, jpeg2000.The Search facility allows the user to find a specific file not only by name or keyword, but also by date. This gives the option of Date Created, Date Modified or Date Accessed to find a desired image or video file.SettingsThe Settings section of the ribbon allows you to:• Import VSC settings from a desired location (Open)• Save the current VSC image settings to a location of your choice (Save)• Save the current VSC settings as the template for the current user profile (Save Profile)• Print the current VSC settings (Print)The Save Profile function will create a snap shot of all the current settings, including magnification, camera settings (including focus), display mode, filters and lighting conditions. These will then become the start-up conditions for the active profile when starting the software or resetting (p. 37). From the factory, these will be Full Resolution display, minimum optical magnification and x1 digital magnification, Flood light source, with Auto Exposure active.QuickCheck SettingsSaves the current sequence in the QuickCheck workspace. “Delete” will remove the selected setting from the sequence.ScannerSelects a scanner attached to the PC and then acquires images.OptionsPersonalises the current user profile and customises functions for all user profiles. Click to display the Control Panel.GeneralSpecifies the background colour (for optimum contrast) and operating language.For the selected language to be displayed correctly, it may be necessary to change the language in the Windows operating system. PCs are supplied with requested language packages for the operating system, and the corresponding language file is also loaded into the VSC Suite. English is always loaded into the VSC Suite as default.It is also possible to select whether onscreen measurements are displayed using the metric or imperial systems. These are specific to the current user profile.The Printer options allow you to set the long edge and short edge borders when printing images or documents from the software suite, or select A6 printer format if you have one attached. These options will affect all users, regardless of profile.Remote Viewing Image Folder (p. 61). Click “Browse…” and navigate to the folder or drop box from which you wish to view images. This is specific to the current user profile.The licence numbers for the IPI and LetterScreen++ features can be entered here if these options are taken later. Simply type in the relevant supplied licence number and click “Accept”. If the correct licence number has been entered, there will be a brief confirmation.OptionsPersonalises the current user profile. Make the required selections and slider adjustments.Note: Front panel Logo illumination and Layout for 4K monitor affect all profiles.• Standby wait time in minutes: To save power and extend lamp life-time, the VSC will go into Standby Mode when there has been no activity for a specified length time. This will turn off the current light source and activate screen saver. Moving the mouse or pressing any key will deactivate Standby Mode, and a window will appear to inform you when the system is about to enter this mode. Changing light source, camera filter, optical magnification or iris size will reset the standby clock. Setting the standby time to “0” will disable the function altogether.• Bandpass Filter Steps: Specifies the increment by which the bandpass filter moves when using the arrow keys. Default value = 3.5 nm; Minimum value = 0.4 nm.• Magnification (Quick Check): Specifies the default magnification when using QuickCheck Mode.• Magnification (Magnifier): Specifies the magnification of the digital magnifier (p. 10). Default value = x4.• Sequencing dwell time in seconds: The VSC Suite features a number of automatic sequences (such as Fluorescence Scan). Specifies the length of time that an auto-sequencing procedure dwells on each stage. Default value = 5 seconds.• Video Frames per second: This allows the user to adjust the camera speed when recording a live video (p. 28). The default setting is 2 frames per second.External CameraThe VSC Suite allows the user to view images from up to two microscopes via external cameras (p. 7). So that the images can be measured accurately, there are pre-set calibration files for our most popular microscopes. The drop down menu lists the available pre-sets, while the default selection is to measure in pixels.Calibration File Editing makes it possible to create or edit pre-set calibration files for any microscope. To create a new pre-set, click “New” and follow the onscreen prompts. This will now appear in the drop down menu.These options will affect all user profiles.Auto ExposureSpecifies whether a particular light source is activated using the camera settings set to auto exposure or to a predetermined exposure setting. If the light source has auto exposure selected, then switching to this light source will activate auto exposure, regardless of the current camera settings. As a default, only the OVD Viewer and Co-axial light sources do not have auto exposure selected.To set a different exposure setting for a particular light, first have the appropriate light activated with the desired manual camera settings BEFORE opening the options menu. Then, open the auto exposure options, un-tick the box for the active light source and click on the icon that will appear to the left of the tick box.You can also select whether all the UV light sources have Gamma correction applied automatically. This is selected for all of these light sources by default.These options are user-specific.CustomiseCreates a customised workspace and personalised shortcut menu.• Customising/creating a workspace: Select a ribbon from the Toolbars that you want in your workspace, tick the relevant box. To select which functions are present from each ribbon, highlight the ribbon name by clicking on it and then tick the relevant boxes from the list of Commands on the right. Unticked ribbons or commands will not appear in the workspace. Press “OK” to then bring the option to name your new workspace or customise an existing one. Foster & Freeman pre-set workspaces cannot be customised. New user workspaces are available to all users.• Customising the shortcut menu: This procedure works much the same as above. To customise the shortcut menu, click on “Select Custom Menu”. The screen will now allow you to pick what commands will appear on the shortcut menu using the same method described above. The shortcut menu is unique to each individual user.DiagnosticsSpecifies which diagnostic tests are performed when the software starts and which are run on demand (p. 97). Click, as required. As default, no tests are selected for startup or on demand.Any changes made here will only affect the current user profiles.See ManualOpens a PDF file for this software manual.AboutDisplays details regarding the VSC main unit. Information such as serial number, software version and firmware version can be found here. If you need to refer to Customer Support Team, they will ask you for the information on this screen.TutorialProvides an interactive tour and brief explanation of some of the main features of the VSC. Users can choose either the Full Tour or a topic of particular interest.Click to display the Tutorial Panel. The Training Sample Sheet supplied with each VSC main unit is required.Text bubbles will be displayed during the progress of the Tutorial which identifying the relevant features of the software.Click “Close Window” to exit the Tutorial at any timeF+F WebsiteIf the PC is connected to the internet, this function will open the default internet browser and take the user to the Foster + Freeman website: (www.fosterfreeman.com).View RibbonThe View Ribbon allows the user to quickly switch between the different screens of the VSC Suite, such as the Spectrum Screen (Spectrometer Ribbon, p. 72) or the Working Folder, or put the unit into or disable Standby (p. 83).Working FolderThe Working Folder is the case report writing section of the VSC Suite. It allows the user to manage the saved images, videos and associated notes.The screen is divided into six sections, consisting of five image windows (numbered 1 – 5, each with a note panel underneath) and one control window (bottom left).The control window has three tabs: Folder Details; Folder Images; Print Options.Folder DetailsAllows the addition of general notes concerning the current folder, e.g. Case details. If required, these notes can appear in the case report.Click in the blank area to start typing notes.Folder ImagesThe path of the currently opened folder is displayed at the top of the control window. At the bottom, click ‘Open folder’ to open a different folder on the PC.To load images into each image window, select the active image window by clicking on the relevant number. Select the desired image from the list in the control window, and it will now appear in the active image window.The image files may have icons at the beginning of their names to indicate if they have associated notes or settings files.To load images into the other image windows; change the active window, then select a new image.Below is an example of the Working Folder, with images loaded into each image window:Open folderSearchDelete imageLoad a previously saved pre-setSaves the currently loaded images as a pre-setCopies the image currently in image 1 into the active windowCopies the graph from the spectrum screen into the active windowCopies the chromaticity diagram into the active windowPrint OptionsIf landscape is selected, all five images (if selected) are printed on one piece of paper, with the details for each image printed underneath.If portrait is selected, each image with its details is printed on a separate piece of paper. Text options allow the user to choose which information is printed with each image, as well as the font size. Image selection determines which images are printed.Spectrum ScreenDisplays the Spectrum Screen.StandbyThis option will put the unit into Standby Mode (p. 83). There is also the option to disable the Standby feature by ticking the Standby Suspend option.Macros RibbonMacros allow the saving of a series of VSC settings (magnification, filters, camera and lighting) for quick recall. Macros are specific commands for the VSC. They can be implemented as an automatic sequence, capturing an image at each stage and opening specified stored/specimen images for comparison.Sequences of macros are saved as a group called a ‘Macro Set’. A Macro Set can comprise any number of commands.To create a new Macro Set, click on “New”. You will then be asked to name the set and choose where you would like to store it. To choose a location, click on the dropdown menu to browse a location. To create a name, type it into the blank box marked “Set Name” and then click “Create”. In the example shown below, the set has been called “Example macro”, and has been saved in a folder called “Macros” for a user profile called “DEMO”, using the pathway C:\Vsc\DEMO\Macros.With a Macro Set created, the remaining functions in this section become available:• Copy to User will copy the currently open Macro Set to the Macros folder for another user profile. Select the desired user profile from the list that appears.• Delete will bring up a Window for the folder where Macro Sets are currently located. Right click on the Macro Set you wish to remove.Now that you have created a set, you will need to add macros for it to apply; all Macro Sets start as empty. Click “Open” and select the Macro Set you wish to add a macro(s) to.Next, choose the settings you desire for your examination (i.e. magnification, light source, filters, camera settings), so that these are the current live settings. For our example, we have chosen to apply a 780 nm IR filter at a specific magnification.In the “Macros” section of the menu ribbon, choose one of the save options.• Save will save the current VSC settings to the currently opened set.• Save with image 1 will save the current VSC settings to the currently opened set, and save the current image in ‘Image1’ to be displayed in Live+Stored mode with the macro each time it is activated. The image file will have the same name as the macro.• Save with image 2 will save the current VSC settings to the currently opened set, and save the current image in ‘Image2’ to be displayed in Live+Stored mode with the macro each time it is activated. The image file will have the same name as the macro.• Delete will bring up a Window for the current Macro Set folder. Right click on the macro you wish to remove.Name the macro accordingly. This macro will be saved as a .set file in the Macro Set folder that is currently open. For this example, we have called our macro “IR 780 nm”.This macro will now appear in the macro panel on the main screen.Repeat this process to create more macros for any desired settings. The new macros will then appear in the same macros panel. They will initially appear in alphabetical order.Towards the bottom of the macros panel are various options that control the running of the macros in the currently loaded set:• Sequence: This will play all macros in the set sequentially, in the order they appear in the set (top to bottom). Macros that have been applied will be ticked (as a progress indicator).• Pause: Pauses the sequencing process described above.• Rearrange order: Click to rearrange the order in which the macros are sequenced. Follow the on screen instructions to rearrange the macros.• Clear: Resets the progress indicators• : Tick to cause the macro sequencing to continuously repeat.• Low Heat Mode: When finishing a sequence, the light source will normally revert to Flood. Ticking this box will revert to Background light instead, reducing the amount of unnecessary heat in the examination area.Below these buttons, there are two tabs at the very bottom of the Macros panel, Image and Edit.Image• Automatic Image Capture – if ticked, when a macro is selected, an image will automatically be saved to the selected folder. The current folder is displayed under ‘Folder name’. To change the folder, click ‘Select Folder’.• Choose the type of image file Automatic Image Capture will save by clicking either “BMP” or “JPG”.• It is also possible to enter an optional file name prefix that will appear in the file name, e.g. a case reference number.EditThe edit tab allows quick access for modifying, adding or deleting macros in the current set.• Update Current Macro – if a macro has been activated, modify any VSC settings as desired, and then click to update this macro.• Delete Current Macro – if a macro has been activated, click to delete it and remove it from the current set.Image Processing (Add Macro)Allows the creation of macros for image processing, e.g. embedding a digital watermark into an image. Once created, they can be accessed via the coloured quick-access pre-set buttons.For a full explanation of all the available functions and how to create macros, access the built in instruction manual by clicking the “Help” icon.Administrator Setup RibbonThis section of the software covers higher administrative functions. It contains functions like Lamp Maintenance, calibration functions, security and the system Diagnostics feature.Lamp MaintenanceDisplays a list of the replaceable light sources. Light sources have different service lives. Total hours used and hours remaining are displayed. Light sources which consist of LEDs are not replaceable and are not monitored in this way.When a light source reaches its maximum hourly usage, a prompt message will appear each time the VSC software is started.The VSC also monitors the current being used by the active light source in Lamp Current Monitoring to the right of the screen. Each light source has a tolerance of +/- 15% of their expected current. The gauge on the right indicates the actual current of the active light source (red bar), with horizontal lines to indicate the upper and lower boundaries of the tolerance. If the level of the red bar sits in between the horizontal lines, then the current is correct.• If the level of the red bar falls below the lower horizontal line, it may indicate that one or more of the bulbs for the active light source is not functioning. See below for instructions on how to replace a bulb.• If the level of the red bar exceeds the upper horizontal line, it may indicate that there is a short or failed a LED. In these circumstances, you should contact your local supplier or Foster + Freeman straight away.It is possible to check the current of each of the light sources from this area. To check the power level of a light source, click on the suggested current value to activate it.Whenever a light source is activated (p. 12) for which the operating current is outside the expected tolerance, a message is displayed prompting you to visit the Lamp Maintenance screen. This will normally indicate that the lamps for that light source need to be replaced.Replacing lampsIt is recommended that the VSC Suite is shut down and the VSC main unit is switched off and unplugged before replacing lamps. See: Hardware Manual.New lamps should not be handled with bare hands. Allow recently active lamps to cool before they are replacedTo replace the appropriate light source, find the location of its bulbs using the photo of the lamp tray from the Lamp Maintenance Screen. If the light source has more than one lamp (e.g. Flood), all the lamps should be replaced. When the required lamps have been replaced, click the button for the light source in the “Replace” section of the Lamp Maintenance Screen, then click “OK” to apply. This will reset the “Hours used” time to “0”.NOTE: It is important to replace lamps at the end of their service life. Whilst lamps may continue to function beyond their service life, light output may be significantly reduced. Though not noticeable to the user, a reduced light output may degrade the performance of the instrument.Lamp TestPerforms a test of the light sources. A report is created which can be saved, printed or copied to Clipboard.Monitor SetupTo ensure that users get the best from their units, the VSC Suite offers the ability to test the monitor. Clicking on the Monitor Setup icon will bring up the screen test card below. The user can then adjust the monitor settings so that the card can be seen correctly.SecurityProvides the option to restrict certain operations within the VSC, and manage the passwords for the administrator and for each user account.First, enter the administrator password, (this is provided in training, otherwise contact Foster and Freeman) then click ‘Accept Password’.Once the administrator password is accepted, the option to restrict certain functions becomes available. Ticking these various options will mean that those specific functions will be restricted to all other users, unless they unlock the security settings (by entering the administrator password).To change the administrator password, click ‘Change Password’ and follow the onscreen prompts.It is possible to enable password access for each user profile, meaning that access can only be gained to that profile by entering the correct password. This must be done with the assistance of your local nominated administrator, as they will need to enter the administrator password. Once this has been entered correctly, the user can create a profile password for the current profile by clicking “User Passwords” and following the onscreen prompts. You must ensure you keep a note of this password. From this point on, the selected user profile can only be accessed by entering in the correct profile password. This is not the same as the administrator password.DiagnosticsStarts a system diagnostic test (File Ribbon, Options, p. 86). A report will be displayed which can be saved or printed. The report will specify whether the VSC has passed or failed each selected section of the diagnostic.Clicking on the downwards arrow will open the dropdown menu.“Options” allows the user to go to the Diagnostics tab in the Options menu (p. 86), where the diagnostic tests are set.The second option is to “Generate Reference Data”. This creates a new reference data set of wavelength values that any future diagnostics will use for comparison. This function is therefore administrator password-locked. The reference data is created by running a diagnostic as described above. Reference data is already generated at the factory from manufacture.The final option is to “Restore original Spectrometer calibration”. This will reset the spectrometer to the original stored calibration file used for diagnostic tests, over-writing any calibration currently in use. This function is therefore administrator password-locked.Spectrometer CalibrationSpecifies the location from which the spectrometer detector will record a spectrum. Allows calibration of the wavelength settings.Set Detector PositionClick the icon and follow the onscreen prompts. A sheet of plain white paper will be needed.WavelengthThe VSC Calibrator and its associated certificates are required.Click the icon and enter the administrator password when required. Follow the onscreen prompts. Ensure that the examination area is clear of any items.The display will revert to Normal mode, the Transmitted light will be activated, and the area at the bottom of the image will change to the Spectrometer Preview (Transmittance) graph. Once you press “OK” on the Information window shown above, the calibration comparison graph will appear as a blue line in the Spectrometer Preview window. The live spectrum for the calibrated filter from the VSC Calibrator will appear as a red line. You must then mark on the red graph the peak/trough corresponding to the peak/trough marked with the green vertical line on the blue graph. The Information window will then prompt you to fill in the wavelength value, as stated on the accompanying certificate for the VSC Calibrator, and click “OK”. You will be asked to do this task for a number of different points on the spectrum. From the example below, the value entered in the window for the first point would be 440.8 nm. The first point is represented as the first pink vertical line on the red graph in the Spectrometer Preview.Note: Calibrating the wavelength of the spectrometer will always reset it to its original position, overwriting any calibration previously performed.CalibrationThis section is used to calibrate the bandpass filter, as well as set the pre-set magnification, and calibrate the magnification distances of the continuous optical magnification lens and the supplementary lens.Bandpass filterClick the icon and follow the onscreen prompts. Ensure that all of the safety flaps are closed.ID1; ID2; ID3Resets the corresponding pre-set value of magnification to the current live magnification.Magnification; Supplementary LensAn accurate ruler, graduated in millimetres or smaller divisions is required.Click on the required icon to display the corresponding dialogue. You will be directed to place your ruler inside the examination area, measure the screen width, and then type this value into the space provided.FocusSpecifies default focus settings for the optical zoom system and supplementary lens. Click on the relevant icon and follow the onscreen prompts. You will be directed to adjust the focus of the image, and when satisfied the image is as clear as possible, click “OK” to saveOther functionsWhite Balance (IR)Click on the icon and follow the on screen prompts. A sheet of plain white paper is required.Restore CalibrationRestores a previously saved calibration file, e.g. factory default.Save CalibrationSaves the current settingsUpdate FirmwareUpdates the firmware file from a location of your choice.(0028-00/AS-03)Copyright © Foster + Freeman LtdUnitrans世联翻译公司在您身边,离您近的翻译公司,心贴心的专业服务,专业的全球语言翻译与信息解决方案供应商,专业翻译机构品牌。无论在本地,国内还是海外,我们的专业、星级体贴服务,为您的事业加速!世联翻译公司在北京、上海、深圳等国际交往城市设有翻译基地,业务覆盖全国城市。每天有近百万字节的信息和贸易通过世联走向全球!积累了大量政商用户数据,翻译人才库数据,多语种语料库大数据。世联品牌和服务品质已得到政务防务和国际组织、跨国公司和大中型企业等近万用户的认可。 专业翻译公司,北京翻译公司,上海翻译公司,英文翻译,日文翻译,韩语翻译,翻译公司排行榜,翻译公司收费价格表,翻译公司收费标准,翻译公司北京,翻译公司上海。